1 Getting started
This chapter explains how to install WISE on your computer and how to start the program. It also describes the main features of the graphical user interface.
1.1 Computer requirements
WISE runs on personal computers running Microsoft Windows 10 or 11 and equipped with modern Intel or Intel compatible processors. To use WISE, your computer should have the following hardware components:
- At least 4 GB of RAM
- A hard disk with at least 10GB free space
To make full use of the application, you need Microsoft Excel (version 2003 or later) to be installed.
If you experience problems when installing WISE, you can contact RIKS (see the section If you experience problems).
1.2 Installing WISE and accompanying tools
There are two ways to install WISE, depending on how the exact version you received is distributed: using a self-extracting installer or through a compressed folder (zip file).
1.2.1 Installation using the self-extracting installer
If you have a previous version of the WISE software installed on your machine, you will be asked whether you want to uninstall it first. We recommend uninstalling it. If you want to keep the previous version, make sure to put the latest version of WISE in a separate directory. During the installation you may encounter a message asking whether you want to keep or replace certain files. We recommend replacing those files for use with WISE. Keeping the old files may cause the software to malfunction.
To install WISE:
- Step 1. Download the WISE setup, or the WISE software and application folders.
- Step 2. Double-click on the WISE_#.#.#_setup.exe. (The #.#.# refers to the version number of the software installation).
- Step 3. Follow the steps on the screen to install the software and data.
- Step 4. (Optional) Download the Map Comparison Kit from https://mck.riks.nl/software. Install it by double-clicking the downloaded file and follow the steps on the screen.
To uninstall WISE:
- Step 1. Open the Control Panel (this is normally available in the Windows Start menu). Open 'Add or Remove Programs' in the Control Panel. Next click the change or remove programs button in the Add or Remove Programs Properties dialog window.
- Step 2. Select WISE from the list of applications and press the Change/Remove button.
- Step 3. The Confirm File Deletion dialog window will open. Press the OK button to confirm that you want to remove WISE and all its files from your hard disk.
- Step 4. Repeat the steps 1 to 3 to uninstall the Map Comparison Kit.
1.2.2 Installation from compressed folder file
Certain versions of WISE are distributed as a zip file with the executables in them.
To install WISE:
- Unzip the zip file you received somewhere on your computer (e.g., C:\Projects\WISE\Software).
To uninstall WISE:
- Simply delete the folder where you unzipped the files to.
1.3 Wise directory structure
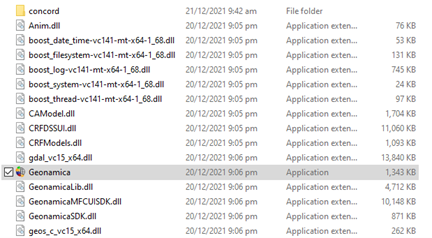
By default WISE is installed in the directory C:\Program Files\Geonamica. The WISE directory includes Geonamica.exe and all the DLL-files required running the WISE system.
By default data for WISE is installed in C:\Documents \

These directories include all the project files, data files, and intermediate map outputs needed to run WISE. Here you will also find the WISE project file, recognizable by the extension *.geoproj. The project file contains the basic information the software needs to run a simulation. The data part of WISE typically contains the following sub-directories and files:
- Animations: animation maps generated during a simulation
- Cache: zoning maps generated during a simulation
- InputMaps: base maps required to run a simulation
- IntermediateMaps: intermediate output maps for the current simulation year
- Legends: map legends
- Log: logged maps generated during a simulation
- Waikato.geoproj: the project file of WISE.
1.4 Map Comparison Kit directory structure
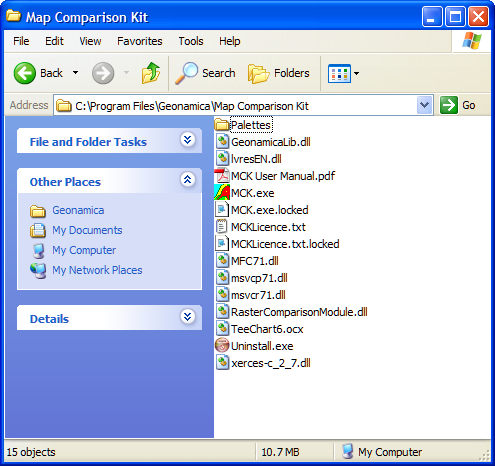
By default the Map Comparison Kit is installed in the directory C:\Program Files\Geonamica. The Map Comparison Kit directory contains the Map Comparison Kit application (MCK.exe) and a set of DLL-files that the application requires to run.
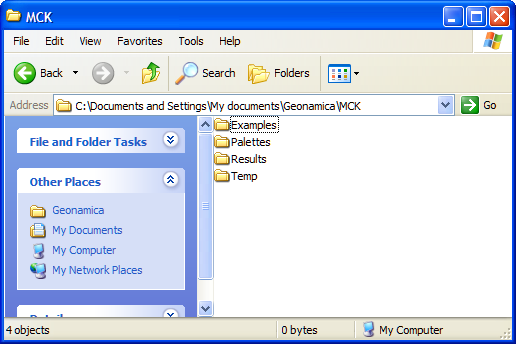
By default additional data for the Map Comparison Kit are installed in C:\ \User\Documents\Geonamica\MCK. There are four sub-directories in this folder:
- Examples: examples developed for the Map Comparison Kit
- Palettes: palettes legends for the Map Comparison Kit
- Results: results generated with the Map Comparison Kit
- Temp: temporary outputs (e.g. reference maps) generated with the Map Comparison Kit.
1.5 Starting WISE
If you've installed WISE through the self-extracting installer, you can start it as follows:
- Click the Start button on the Windows taskbar
- Go to All Programs / Geonamica / WISE.
- Click the GEONAMICA icon .
If you've installed from a compressed folder (zip file):
- In the folder where you unzipped the files, double-click 'Geonamica.exe'.
1.5.1 Importing the licence file
The first time you start WISE, a dialog window will appear asking you to install a licence file for WISE.
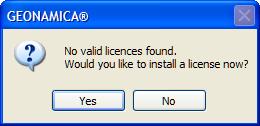
- Click the OK button on the message window.
A dialog window will open allowing you to navigate to the folder where you put the licence file for WISE that you received from RIKS.
- Select the licence file with the extension *.lic
- Press the Open button of this dialog window.
The licence file will be created automatically in the same directory as Geonamica.exe.
Each time you start WISE, the About window appears (see the section About).
-Click the OK button on the About window.
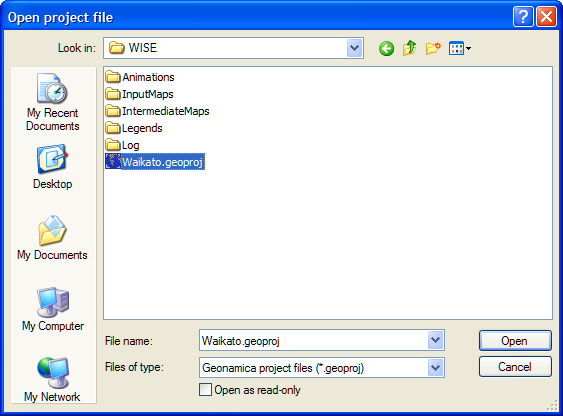
1.5.2 Opening the project file
- After you press the OK button on the About window, the Open project file dialog window opens.
- Navigate to the project file that you want to open and double-click on it.
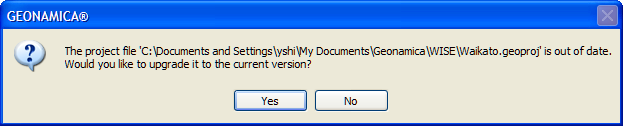
If the project file you want to open is created with an older version of WISE, a message window appears asking you whether to upgrade the project file to the current version of software.
- Click the No button to exit the action. You could not open it with the current version of WISE. You can only open it with the older version of WISE with which you created this project file.
- Click the Yes button to upgrade the project file automatically. Then you can open it with the current version of WISE.
WISE will be started and you will see the WISE - ### application window on your screen, where “###” is the project file name that you selected.
1.6 Screen layout
When you start WISE, the application window opens. This is the window in which you will run your models. You can
arrange windows as you like in the application window. Before a project file has been opened, the window is empty
except for its Caption bar, Status bar, Toolbar and Menu bar. The different components of this window will be
described in the next paragraphs.
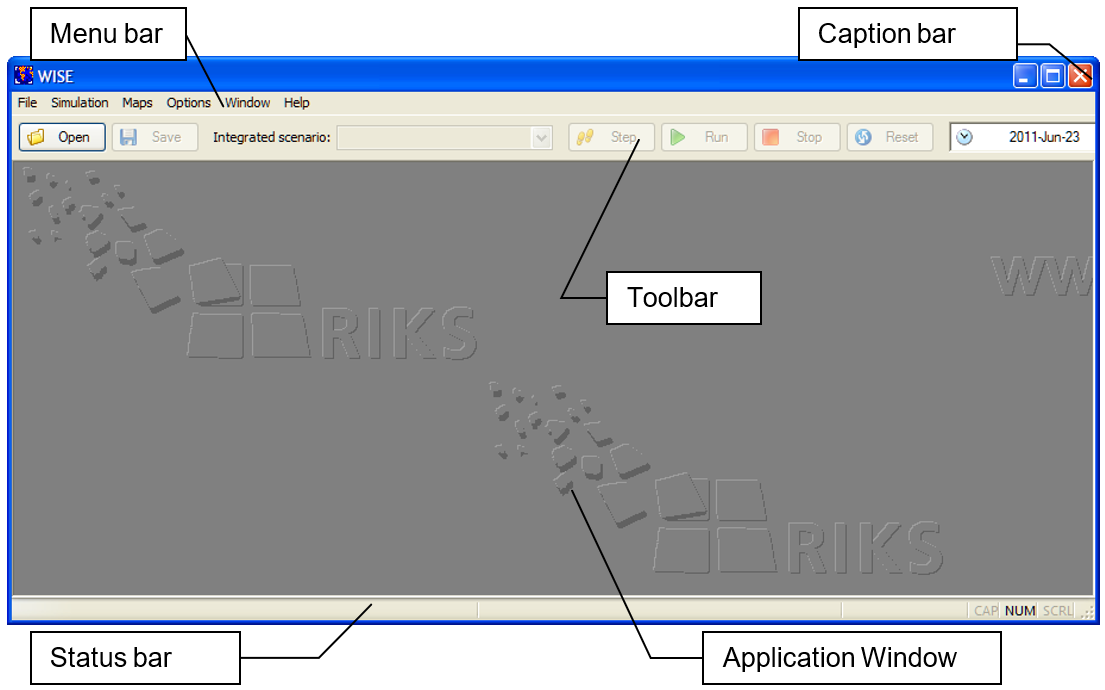
1.6.1 Caption bar and menu bar
The Caption Bar, also called title bar, of the application window shows the name of the application: Geonamica. As soon as a project file is opened, the title will be extended with the name of the project file.
The Menu Bar of the application window contains the main menu of WISE. The commands are logically organised in the menu so that you will quickly become comfortable with the various functions of the software. The menus are summarised in the table below; subsequent sections elaborate on the description. The section The WISE menu system gives an overview of all menu commands.
Menu | Function |
File | Manage your project files |
Simulation | Control the simulation |
Options | Customise the workspace and select types of output |
Window | Manage your windows on the screen |
Help | Look up the system information and find help documentation |
1.6.2 Toolbar
The Toolbar gives faster access to some of the more frequently used commands that are also accessible via the menu.
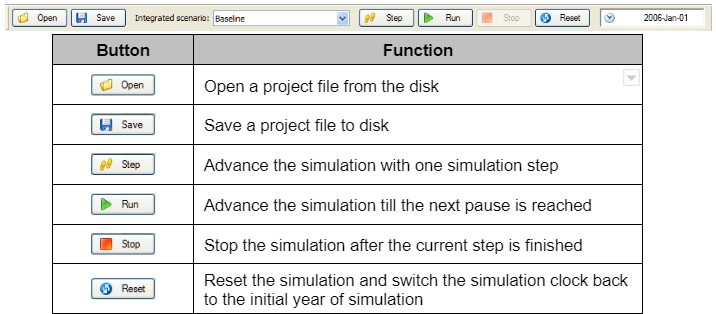
A list box next to Integrated scenario is also displayed on the toolbar. All available integrated scenarios are
displayed on the dropdown list where you can select – that is, load – an integrated scenario. When collapsed, the list
box shows the name of the active scenario.

The Toolbar also displays the simulation clock. Each time step, the clock is updated to match the current value, which means that it increases with steps of 1 year in WISE.
1.6.3 Status bar
The Status bar is displayed at the bottom of the application window. This area provides information to you on your actions while you are working with the application. The Status bar describes the following information:
- When you use the mouse or arrow keys to navigate through menus, it describes actions of menu commands.
- When you press the buttons on the toolbar, it describes actions of this button.
- When you move the mouse on a raster map, it describes the location of the cell that is pointed and the category or value on this cell is displayed in brackets.
- When you move the mouse on a network map, it describes the x and y coordinators of the location.
The Status bar also indicates which of the following keys are latched down: the Caps Lock key (CAP), the Num Lock key (NUM), or the Scroll Lock key (SCRL).
1.7 System Information
The different commands in the Help menu allow you to look up the system information about WISE, its commands, options, and tools. You can use the Help menu to select the type of information that you want WISE to display on the screen. For more information see the section Help menu.
1.7.1 Index
You can use the Index command to get the opening screen of the on-line help file of WISE. From the WISE documentation opening screen, you can jump to step-by-step instructions for using Metronamica. Click the topic that you want help on. Once you open the WISE documentation on-line help window, you can click the Close button whenever you want to exit.
1.7.2 Licence
You can use the 'Licence...' menu option to open the 'Licence' window which shows all licencing information. All licences for Geonamica-based software on your computer will be listed in the 'Licences found' table in this window.
WISE lets you import a licence file by clicking 'Read a licence file...'. This will open an 'Open' dialog window from which youc an select the licence file you received.
After reading a licence file, WISE will store files relevant to licensing under a folder on your computer. You can click on the 'Open licence folder...' button to view the files and the directory of this folder.
1.7.3 Checking for updates
You can use the Check for updates… command to check if you are using the latest version of WISE software. If the software you are using is not the latest one, the system will provide you information about how to request an update of the software.
1.7.4 About
You can use the About… command to open the About window. You can find here the copyright notice and version number of WISE that you are using. The latter is important if you need assistance with the software from the developers (see the section If you experience problems) or when you request an update of the software.

1.8 Closing WISE
You can use the Close project command to close WISE.
- Click the File menu and click Close project.
If you have a project file open and you have made any changes, one message window will pop-up and will ask whether you want to save changes before closing.
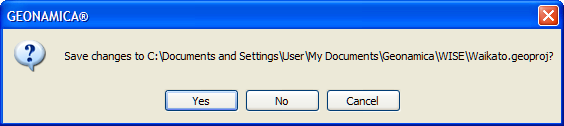
If you confirm that you want to save changes, you will get the Set external file names dialog window.
- Click the Yes button of the Save dialog window to carry out the action of saving and closing.
More information on saving changes is given in the section Saving changes of this manual.
1.9 If you experience problems
If you experience problems installing or running WISE, please contact us with the version number of the Geonamica application that you are using (see the section About):
Research Institute for Knowledge Systems bv. To the attention of Hedwig van Delden Hertogsingel 11B, 6211NC Maastricht, The Netherlands Tel: +31 (43) 321 52 31 E-mail: info@riks.nl Website: www.riks.nl